Adventure Castle Legend!

Hey it’s Gene here…

What do you do when it’s dark, wet and cold.?

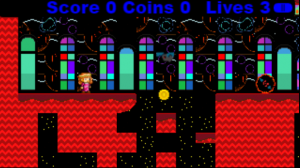
Spend the afternoon pretending to be a princess exploring a dangerously beautiful castle!

It’s official. I am a legend and king of “The Castle”.

See if you can make it through all ten levels in one sitting.

(Click on image to Play).

HTML5 Retro Gaming at it’s best!   Be patient while it loads  🙂

There’s a new Law in Town!

Hi Harmony here…

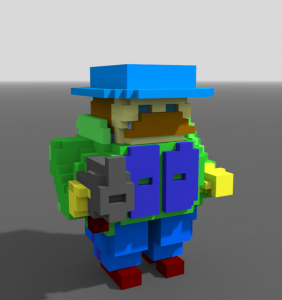
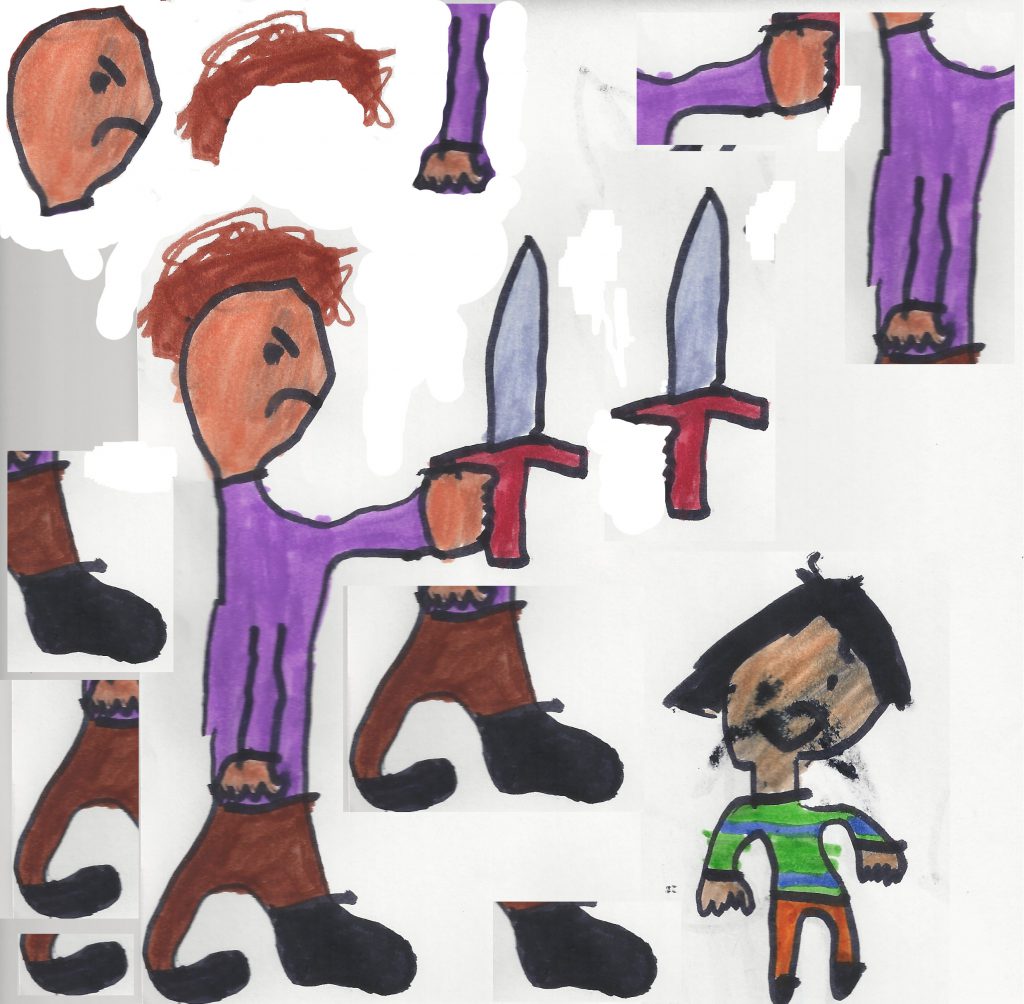
Check out this feature character for our new game Endless Elevator.

He’s “The Law Man” and he’s bringing Justice to the small screen.

He’s a chunky little guy and dependably dapper.

Look at that moustache!

He comes complete with accessorised bullet proof vest and fast blasting six gun action.

Bad Guys look out! He’s coming soon.

Unity3D Smooth Moves

Xander here.

For our new game Endless Elevator I’ve been working on finding the best method of moving the character through the scenes.

At it’s most basic our character needs to move left and right across the screen and forwards and backwards on a couple of limited parallel z axis.

The only way he can move up or down is by an escalator or an elevator so we have to take control away from the user in that case and handover to another controller.  Then once we were done moving we can hand control back to the user.

But it was mostly the left-right, forwards-backwards movements I was concerned about for this set of tests.

I wanted a really simple set of controls and didn’t want to hand them over to the Physics Engine with Rigidbodies and Colliders.  But the character movement couldn’t feel stiff or mechanical. We wanted a bit of slack in the movement and bounce

.

I scripted up three different methods of controlling the character with flip switches to move between them during testing so we could decide on the best looking movement.

Method One was the most simple basic Vector move.

Method Two was a damped Vector move using mathf.DampSmooth.

Method Three was to implement the Character Controller and use Object.Move.

I’ll put the script down the bottom of the post. Right now I want to look the actual movement controllers and the Input into those commands.

Let’s start with the Basic Move controller.

We define our speed as a float and get the x and z values from our Vertical and Horizontal Input Axis (WASD or Arrow Keys on the computer).

public float speed = 10f;
var x = Input.GetAxis(“Horizontal”);     // this is a float value between -1 and 1 that tracks left and right input from the left and right controller.  If it’s under 0 we move left. If it’s over 0 we move right. Simple easy to understand and doesn’t factor into the movement at all except to define which way we go.

var z = Input.GetAxis(“Vertical”);  // We do the same for the z value which governs character depth on the screen (forwards and backwards).

if (x < 0) {
transform.position -= new Vector3(speed * Time.deltaTime, 0, 0);  // Move Left the value of speed and normalised for frame rate differences with the deltaTime function.
}
if (x > 0) {
transform.position += new Vector3(speed * Time.deltaTime, 0, 0);  // Right
}
if (z < 0) {
transform.position -= new Vector3(0, 0, speed * Time.deltaTime);  // Towards the camera
}
if (z > 0)
{
transform.position += new Vector3(0, 0, speed * Time.deltaTime);  // Away from the camera
}
Every Update we move our character in the desired direction at a speed of 10.

This is fine. It works. But it looks kind of static.  The character hits full speed straight away and stops on a dime.  It’s not particularly realistic looking (and maybe you want your game to have this look) and not what I really wanted.  But it’s a great comparison to judge the other two methods by.

Let’s look at the Smooth Damp method next.

We use the same kind of input:  eg. x = Input.GetAxis(“Horizontal”);

speed = 1f;  //  This method is much faster so we need to reduce the speed to keep all the methods at roughly the same rate.

We set some variables that control the “bounciness” of the smoothing.

public float forwardVelocity = 0;
public float sidewaysVelocity = 10;

// These Velocity floats hold the value of the velocity between Updates (I only wanted some on the left right movement)

public float movementSmoothing = 0.15f;  // the higher the number the slower it get’s to top speed.

Mathf.SmoothDamp takes the current position and the raw input from the Input keys. That means that those values between -1 and 1 amp up or down over a small amount of time (depending on the direction) . This is is factored together with the current velocity
movementInput.x = Mathf.SmoothDamp(movementInput.x, Input.GetAxisRaw(“Horizontal”), ref forwardVelocity, movementSmoothing);
movementInput.y = Mathf.SmoothDamp(movementInput.y, Input.GetAxisRaw(“Vertical”), ref sidewaysVelocity, movementSmoothing);
transform.position += new Vector3(movementInput.x * speed, 0, movementInput.y * speed);

//transform.position += new Vector3(movementInput.x * speed * Time.deltaTime, 0, movementInput.y* speed * Time.deltaTime);  // I had that last line with the deltaTime in it as well but it looked “moochy” if that’s a word and did the opposite of smoothing the transitions so it ended up looking like this:

movementInput.x = Mathf.SmoothDamp(movementInput.x, Input.GetAxisRaw(“Horizontal”), ref forwardVelocity, movementSmoothing);

Mathf.SmoothDamp
Gradually changes a value towards a desired goal over time.

public static float SmoothDamp(float current, float target, ref float currentVelocity, float smoothTime, float maxSpeed = Mathf.Infinity, float deltaTime = Time.deltaTime);

Input.GetAxisRaw(“Horizontal”) goes straight from -1 on left arrow back to 0 when off and +1 on right arrow – no smoothing.
Input.GetAxis(“Horizontal”); does the same thing but increments gradually over a short time so that it goes from 0 to 1 in a few microseconds.

Sooo using the Raw one and pumping it into the SmoothDamp function does pretty much the same thing. In the Editor I cannot tell the difference between them.

This controller took a bit more playing with but was really looking good.  It picks up speed incrementally when you start moving and there is a controllable amount of exaggerated overshooting when you change direction. If you set the smoothing or velocity too high it gets really bouncy and a little crazy but at low levels it looks cartoony and mimics the  stretch and squash of that genre.

Lastly I looked at the character controller. It’s part of the system so really easy to set up in a simple move script to get a feel for it.

speed = 20f;  // Once again the speed was modified to get a realistic similarity between the three methods.

The character direction comes straight from the input controllers and the cc.Move method handles everything else.

direction = new Vector3((Input.GetAxis(“Vertical”)), 0, (-(Input.GetAxis(“Horizontal”))));
direction1 = transform.TransformDirection(-direction);
cc.Move(direction1 * speed * Time.deltaTime);

Initially this looked really good. But the more I played with it to try and limit the way it was moving the character and the amount of radians it could turn it quickly got way too complicated and I started getting weird movement behaviour.  So if you want a character controller that you can just plug in and go with then this is good. But if you want more control be prepared for a longer haul.

As with everything this was a greats study into character control methods and one step in the path of looking for a smooth moving character but in the end following a massive redesign of the level system of my game I ended up going with a physics based collider system for the levels and a physics controller.

Not all my time wasted though as I had a better understanding of what I wanted and used elements of both the Smooth Move method and the Basic method in my final Character Control script.


This is the final edit of the script I was using if you want to play with it.  Just attach it to a player and add a character controller.  Use the tick boxes on the bools in the editor to switch between methods while playing.


using System.Collections;
using System.Collections.Generic;
using UnityEngine;

public class SmoothMove : MonoBehaviour
{

public bool basicMove;
public bool smoothDampMove;
public bool CCMove;

public Vector2 movementInput = Vector2.zero;
public float forwardVelocity = 0;
public float sidewaysVelocity = 10;

public float movementSmoothing = 0.15f; // the higher the number the slower it get’s to top speed
public float speed;

public CharacterController cc;
public Vector3 direction = Vector3.zero;
public Vector3 direction1; // used for debugging in the editor
float smooth = 50.0f;

// Update is called once per frame
void Update()
{
if (basicMove)
{
speed = 10f;
var x = Input.GetAxis(“Horizontal”);
var z = Input.GetAxis(“Vertical”);

if (x < 0)
{
transform.position -= new Vector3(speed * Time.deltaTime, 0, 0);
}
if (x > 0)
{
transform.position += new Vector3(speed * Time.deltaTime, 0, 0);
}

if (z < 0)
{
transform.position -= new Vector3(0, 0, speed * Time.deltaTime);
}
if (z > 0)
{
transform.position += new Vector3(0, 0, speed * Time.deltaTime);
}
}

if (smoothDampMove)
{
speed = 1f;
movementInput.x = Mathf.SmoothDamp(movementInput.x, Input.GetAxisRaw(“Horizontal”), ref forwardVelocity, movementSmoothing);
movementInput.y = Mathf.SmoothDamp(movementInput.y, Input.GetAxisRaw(“Vertical”), ref sidewaysVelocity, movementSmoothing);
//transform.position += new Vector3(movementInput.x * speed * Time.deltaTime, 0, movementInput.y* speed * Time.deltaTime);
transform.position += new Vector3(movementInput.x * speed, 0, movementInput.y * speed);
}

if (CCMove)
{
speed = 20f;
direction = new Vector3((Input.GetAxis(“Vertical”)), 0, (-(Input.GetAxis(“Horizontal”))));
//direction = new Vector3(0, 0, (-Input.GetAxis(“Horizontal”)));
direction1 = transform.TransformDirection(direction);
//direction1 *= speed;
cc.Move(direction1 * speed * Time.deltaTime);
}
}
}



Voxellated Procrastination


Oh My DOG! Playing with MagicalVoxel is fun! I don’t know what made me open it up. A little bit of frustration with my Dog Run game that’s not really going anywhere that I was happy with. If you feel like doing some beta testing and telling me where I’ve got it all wrong subscribe and I’ll add you into the Alpha Testers group.

You know when you get into that development funk and you can’t seem to get anything to work?

Anyway I was doing some animation research and saw that Magical Voxel had a new upgrade that enabled little animations and that kind of excited me. So I downloaded it and started playing around then BOOM. Inspiration strikes and in a couple of hours I got ten level objects and a new idea for a game and another project building in Unity already.

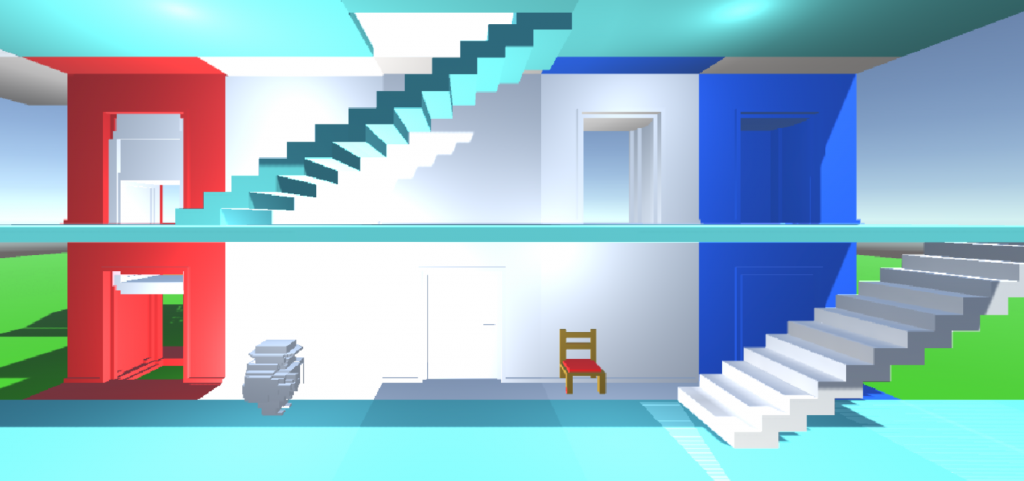
The voxel editor isn’t that great for porting colored objects into unity cause it creates a new vector for every color and does something a bit funky with the poly count. No problem. I did everything in one color to reduce the number of crazy vectors and imported it into Blender.  Then I added a decimation modifier to lower the poly count and merged a few faces. But then I just started importing models directly into Unity with simple walls and floors and doors and it was awesome.  There was no need to reduce the poly count with such simple meshes. Such a quick workflow!  I could make a doorway or a lift and the actual door or lift box would just fit inside the door frame or lift shaft with no modifications! Awesome. Everything to the same scale.

Import all that into unity and add a dummy character and some basic lighting and here you go…….

Looks great huh?

How to Backup Unity Projects

Unity projects need to be backed up.

There’s a lot of options and lot’s of questions to ask yourself.

The big question is…could you recreate your project from scratch if something happened to it?

Does your Design or Build documentation cover off every tweak and setting of all your scenes, objects, and prefabs?

What about using a Unity Plug In?
Or Custom Scripts?
Also what do you neeed to Backup?

If you’re using Source Control like SVN or GIT what do you exclude in your exclude file?
What does Unity say?
What about Unity users in the forums what is their advice?

Backup Options

Let’s start with some options for backing up Unity Projects.
I’ll list the one’s I’ve looked at here:
1. Manual backup of your Unity Project Folder
– That’s right. Just copy the whole root project folder somewhere else.
It’s quick and dirty but reliable. Even better if you copy to another location off your workstation.

2. Your project can be placed under source control.
– The Unity Manual says that Unity supports version control integration with Perforce and Plastic SCM.
– I’ve tried Perforce and it was a little difficult to set up and I can’t say I really got some of the key concepts behind the product but it looks like standard source control and seems to work.
– I didn’t try Plastic SCM as it didn’t seem as well integrated or supported
– GIT is an easier beast to work with I found.
– Unity have advice on using external source control software like SVN for your project files and code.

3. You can use the Unity Editor to work in the Cloud
– There is a button called Collaborate! Just click it.

When you open up your Projects page in Unity you can see the one’s in Cloud storage here:

The features of the Cloud storage are here: https://unity3d.com/unity/features/collaborate
You don’t get much for a free account – but it’s not that expensive and if you have a good internet connection it’s very reliable.

4. In the Asset Store there is (or at least used to be) a Unity Asset Repository product.
– It seems to be discontinued so I won’t dwell on that.

5. There is also a whole slew of Tools and Products up there in the store to help with managing Version Control. There are Backup Products in the Asset Store like Zip Backup and Backup Project.

I’ve never used any of these so I won’t comment on that either. There are plenty of reviews on the Asset Store so I guess if you’re interested you can read them.

6. If you want automatic regular backups on a Mac you could use Time Machine.
On a Windows box you could also schedule backups with File History and/or Windows Backup and Restore.
Another alternative that works on anything is DropBox.

7. Finally – there are of course dedicated Backup Solutions ( think NetBackup ) out there – maybe you are already using one.

What to Backup?

So the next question is what in your Unity Project Folder do you need to back up?
The short answer is the Assets and Project Settings only.
The Library, Temp, Obj, .SLNs and .Proj will be regenerated.

But the long answer has a few other folders that you might have created for your project.

The base folders that all projects get when initiated are: Assets, Library, & Project Settings.

Assets is where the majority of your work will go but you could also use any number of other special folders like:
Editor
Editor Default Resources
Gizmos
Plug-ins
Resources
Standard Assets
StreamingAssets
Hidden Assets

There is also a Temp folder which sometimes has it’s uses to keep a copy of.
(See my blog post on recovering a corrupted scene – DO NOT RESTART UNITY before taking a backup!)

So what folders need to be backed up?
Assets definitely – but everything in there? What about .meta files.
Meta files are created for every asset and are visible in the explorer of your operating system but not by default visible in the Unity Editor.
The Meta file has a reference to the Unity ID code assigned to the object. If you lose your meta file you lose all the references to your objects in the editor and have to relink everything.

The Library folder is analagous to the Unity cache. It’s a dynamically loaded set of data that Unity creates for your project. Each asset in your Asset’s folder is converted into a Unit Readable data format in this folder so that it can be dynamically played with in the editor. Normally as a user you would not need to do anything with the contents of this folder and it’s not necessary to back it up as it’s able to be regenerated every time Unity starts up your project.

The Unity Manual says:
When backing up a project, or adding a project to a Version Control Repository, you should include the main Unity project folder, containing both the Assets and ProjectSettings folders. All the information in these folders is crucial to the way Unity works. You should omit the Library and Temp folders for backup purposes.

I guess one of the bottom lines of this post is: Use Version Control.
But are version control and back ups two different things? I say yes.

Version Control is a point in time file based recovery of your work but Backups are a whole system recovery for when things really go boom! Like when your laptop gets dropped off the balcony.

So if you are using Version Control you also need to use an ignore file so you don’t have to backup stuff that you don’t need to back up.

There are some really awesome flame wars in all sorts of forums arguing for and against .gitignore files. This reddit link is really funny if you like reading passionate people and idiots talking to each other on the internet.
https://www.reddit.com/r/Unity3D/comments/557bhh/version_control_is_important_and_wed_like_your/

A .gitignore file tells Git which files/folders should not be in the repository. It is usually used to avoid committing transient files or files that can be reproduced (like those in the Library folder).

When you create a new repository on GitHub. There is a dropdown that lets you choose a .gitignore file and they just happen to have a Unity one available. Just grab a copy of it and stick it in the main folder of your Unity project.

I commit to the repository every time I have made a big change. This lets me revert to any previous commit if necessary. The downside is that unless you feel like paying, your repository will need to be public, meaning anyone can see your project.

If you don’t want to use the terminal, you can also download Github desktop which gives you a simple and clear interface to handle your repositories.

The GitHub.app is the easiest way to work with Git. It is simple to create a repository by draging your Unity folder into the GitHub.app and add your .gitignore file. It only takes seconds and will save your butt.

There are other choices for a source control browser:
Gitkraken
SourceTree

Before checking your project in, you have to tell Unity to modify the project structure slightly to make it compatible with storing assets in an external version control system. This is done by selecting Edit->Project Settings->Editor in the application menu and enabling External Version Control support by selecting Visible Meta Files in the dropdown for Version Contr

I’ve read from various forums that people have been backing up by creating an empty game object and parenting all other objects under it. Then they will create a prefab out of this and export the object and scenes at the same time. It kind of makes sense for an easy restore of your objects as all you have to do is import that prefab into a project to do a restore.
Obviously this is no good if you got lots (like thousands) of objects and assets. You will lose things like layer names, tags, and other Project settings. Plus you might as well just copy the Project folder. Exporting packages is useful thing, but it’s not a substitute for a proper backup.

When you do backup make sure you get all the metafiles. The files are used to keep track of everything in the project and their locations. They are hidden by default, but can be made visible by going into Edit | Project Settings | Editor Settings | switch Version Control Mode to Visible Meta Files.

That’s about it for backups – I guess the bottom line is – if you are not backing up…

Please do!

The Kit

This is the hardware and software that I’m currently using to make games.

My main machine is a Venom BlackBox laptop. It’s got an i5 Intel Core and 8 GB of RAM. The OS c:\ drive is flash and the d:\ storage drive is SAS. so the operating system stays fast but it also has plenty of local storage. This was my main expense and after working for years on a 3nd hand Toshiba it’s an absolute dream. They are made locally in Melbourne at a place called MLN Computers who specialize in Gaming Hardware and it’s just beautifully finished and super thin and light. Plus it’s Batman black with green backlit keys if you want them. Off mains it’s a bit of a battery hog but for what I do on it and the process heavy apps I use it does pretty well. It gives a lot of power and is very stable. The only down side is because it is very thin the fan comes on quickly and can be loud to the point of distraction sometimes.

I do a lot of music and audio work on my laptop and use a Line 6 KB37 midi keyboard and digital USB audio interface. I got this years ago and its been super awesome. It come bundled with the Line 6 Pod Farm software and a bunch of other audio apps like Reason 10 and Ableton Lite and virtual instruments from Korg (the amazing Korg Legacy Collection), and Applied Acoustics (the fully versatile AAS Player and gorgeous LoungeLizard EP-4). Sadly it’s no longer made and I have no idea what I’m going to do if it ever gives up the ghost – probably go back to Linux Audio (sadly the KB37 was incompatible with my Linux audio box if you ever get the chance to play with it I recommend Musix or Ubuntu Studio but there are heaps of other options).

For either guitar or keyboard it’s fabulously versatile and can also interface with whatever Daw I’m using.

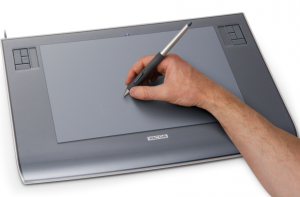
I bought a second hand Wacom drawing tablet. When I picked it up it turned out to be an old one from one of Melbourne’s larger game companies. I took that as a good sign.

I started making games in htlm5 and all I really needed for software was a copy of Sublime Text 3, Gimp and the Tiled map editor.

I moved on to Unity3d and Visual Studio 2017 but still use Gimp as my main art making software.

I tried lots of other art packages like Spriter, Krita, Pencil,  Adobe Illustrator CS2, Adobe Photoshop CS2, and GraphicsGale.  All of them were good but I like Gimp best. It seems to have all the features that I need and I’m more comfortable with the open source nature of the project.

I tried lots of other Game Engines as well: Stencyl, Unreal Engine and Amazon Lumberyard but I think I’ll stick with Unity for a while.

For model making I use Blender. I find it easier than the other programs I’ve tried (even with all the keyboard shortcuts).  The community is awesome too.

I also really like using  MagicaVoxel for quick fun models.

I tried DAZ Studio, DesignDoll and Sculptris but I always come back to Blender.

For animation in 2D I use Plastic Animation Paper (PAP4 ) and Gimp.  I really like PAP4. It’s old but has very powerful features.  I use Blender for 3D Animation.

For making video content and editing I use the OpenShot Video Editor.

All my documentation is done with OpenOffice.

For Source Control I use GitHub and TortoiseSVN, or a local Helix Perforce service.

For an Android emulator I either use Android Studio, KOPLAYER or Leapdroid.  I think Leapdroid is my favourite.

I have a really really big list of software that I tried and never really used. Mostly because I just never got time and if I spent all my time getting new toys I wouldn’t have time to play with the ones I already have.


Make a Promotional Video for your Mobile Game

One of the best ways to get noticed on the App Store (any one) is to have a video that markets your games best assets. We recently did one for NumBlocks which has, in all honesty, been struggling to make an impact on the Play Store. The game is elegantly simple and looks great. It has a good mechanic and is easy to learn and play. We built it as a platform to test our ability to publish something and to work through the hurdles of getting a game finished. In that respect it is perfect!

Have a go of NumBlocks and let us know what you think? (click image to Play)

Not having a huge budget for marketing we wanted to make it ourselves. Were not audio visual newbies and weren’t looking for anything too complex. Plus the game is free so there is really no point paying someone to effectively polish a lump of coal in the diamond that we know it is.

Here is the finished product (click to Play!):

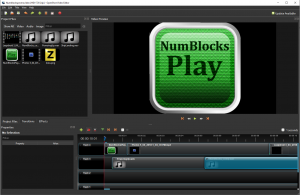
We used the OpenShot Video Editor.  Here at ZuluOneZero we support open source community driven projects as our default posture when looking for software to work with.  OpenShot Video Editor is crafted with love and open-source.  It’s under the free & open-source license forever (GPL version 3.0).

It’s very good and worked perfectly for our project. It has a simple but powerful interface and comes with a very nice set of built in transitions and other features.

We started off with a straight image of our NumBlocks logo. I really like the glowing internal light of this logo and the straightforward “Play” on the front. We did this icon in Gimp and imported it into the editor.

Check it out:

Next we got crafty. I asked the team (read ‘my brain’) for a flashing run through of the numbers in sequence to build tension and to lead in to the game play. We tried doing this manually in the editor but it was too fiddly lining up 40+ images with the right timing. So we came up with a novel solution and ended up opening all the number icon jpegs directly from the operating system folder onto the system picture viewer.  We then used the built in Game Bar that comes with Windows 10 to record a screen capture of the viewer. I manually scrolled through the number icons with the arrow keys on the keyboard at the tempo I wanted and sped up to a crescendo at the end.

We used the record feature of the game bar again to record the game play sequences. This time we ran the app on a mobile emulator on the desktop. The only issue I had with the final outcome of this was that the mouse pointer has to be used and looks a bit derpy. Next time I’ll download a pointy finger mouse icon to use so it looks more like a mobile game.  We edited the footage down to key sequences and game play.

Next I used the OpenShot speed manipulation tools to speed up a section of the game play footage to make it look more exciting and to showcase the game.

Next we stripped the audio from the existing clips and laid down some original music from the game.  You can listed to the music here on SoundCloud.

P.S. If you want to be notified when I post please sign up and subscribe using the form at the lower right of the page.

Do NOT Restart Unity After a Crash!

It all started when my laptop went into sleep mode.
I was doing some play testing of my Dog Run game and had to take a work call.
I know I know “real” work getting in the way of my real life.

Something happened and the laptop stopped responding. Wouldn’t come out of sleep mode and had to be restarted.

Now normally Unity is pretty stable. I actually can’t remember any time when it caused a crash or stopped responding or has died on me but I guess being in run mode while the laptop was asleep may have been a contributing factor.

When I restarted my machine and opened my Game again in Unity the editor barfed and gave me an error in the console like:

GetPathNameExtension(path) == “unity”
Unknown error occurred while loading ‘/Scenes/MainScene.unity’.

Then it asked if I would like to open the default scene which I promptly took to be My default scene. But sadly it wasn’t. It was the Unity default scene that you see when you open up a new project.

All of my assets and settings were gone. All those hours of tweaking objects’ positions and rotations getting things just right were wiped off the board like an angry chess master.
Poo.


This is the big lesson of today.

If the Unity Editor or your operating system crashes do NOT start Unity again without making a backup!

I know there are a few other lessons here like: 1. Always backup your project, and 2. Use source control, and 3. Backup your project again, and 4. Save your project regularly during your workflow and 5. Save the scene and the project BEFORE hitting Play when you are testing your game.

But I want to say it again because opening your project up after a crash in Unity is a really easy thing to do and seems like the right thing to do and is normal and natural and good. But it’s NOT!

DO NOT OPEN UNITY AFTER A CRASH!

Not without first backing up your project folders.

Now I know backup is a whole subject in itself and I’m going to make an entry on that soon but there are some simple ways to save the day here.

When you hit the Play button in Unity the scene and all the running elements are saved in the project’s Temp directory.

If you have a crash and want to restore your scene file, you cannot re-launch the Unity Editor after the crash.
If you do it will blow away the Temp directory and you will lose the last saved scene and all your progress with it!

Inside your Project directory folder there should be a Temp/__Backupscenes directory. If you are lucky in here you will find a file called either 0.backup or “__EditModeScene” (depending on Unity version) which is your saved scene file.

First! Make a backup of your Project directory. Take the whole thing. Easiest quickest way is to copy the whole project folder to another directory.

Then all you have to do is to copy this file back into you project and replace the broken scene file with the copy. Set the file extension to .unity in order to make this file recognizable as Unity scene file.

Please backup your project folder before making the change.

When you Run Unity and open the Scene you just moved from the Temp folder hopefully all or at least most, of your changes are there and the scene is restored.

So Unity is saving your scene every time when you hit the play button, but not over the original scene file, instead it is saved in the project’s Temp directory.

But be careful. You cannot start the Unity editor after the crash. This is by nature a Temp directory whose content is created dynamically when working in Unity.
If you restart you will lose the scene file and all the progress with it.

Once you have done this start using a new workflow.
Take regular backups.
Use source control.
Hit Save regularly while working in Unity.
Hit Save before you hit Play when testing in Unity.

Inspiration

I was getting rather upset with myself for not finishing my game yet. I had spent a lot of time learning how to get the animation of the dog into a state that wasn’t completely crap but … that a game does not make. I couldn’t visualize what the game was about anymore and I couldn’t actually see the point of continuing. It seems sometimes that it’s easier to cut your losses and just give up when a project is not coming together and weeks have turned into months .

I used to spend a lot of time doing quick two week Dev runs for a game. In those two weeks I’d get a good feel for the game and by the end of it I’d know if it was going to be viable. I spend a lot of time planning and doing design docs and color charts and programming core functionality. It’s quick fun and satisfying but it’s not an end product and I probably wouldn’t even show most of those games to close friends.  But that’s what they are about, learning quickly if your idea is going to work or not.

So this game was about taking an idea from start to finish. Making everything as good as I could. Spending time getting drawings right. It’s much harder and takes much longer than you think. And those weeks where not much happens really impact on the sense of progress and achievement. Its easy to slowly get disillusioned.

You might want to give up and start hacking for fun again. You might get stressed that time spent doing all this work for nothing was going to have you end up in the poor house (auto-corrected from poo house – which is a real place too). You might suspect that you have extended your childhood too far into responsible adult life and that you are a talentless man-child who will never do anything. Ermmm.

I know some get feelings like this more than others and I’m truly sorry for their pain in life. In truth I’m probably living in a fantasy world but its one of my own making and to fuel it I need inspiration. The desire to make games stems from a belief that if you do what you enjoy then you will be good at it and successful. Also I think the gamefication of life makes it better and more enjoyable.

Simple things like watching the Mrs trying to catch grapes in her mouth for the first time and Everything my son does. At nine everything he does is a game. He never walks to his room if he can jump pillows down the hall (lava!).

Games can be addictive. God knows I’ve had to strip even Tetris and Minesweeper from old computers just to get some “real” work done. So I have a vague feeling of guilt when I play games instead of making them or doing something else productive.

The point is there are good reasons to make games, and better reasons to try and make great one’s. So that’s what happened. I played a game I was using as a reference and benchmark for my own and quite simply it inspired me. So now let’s get back to making games.


Animating the Running Dog with Unity and GIMP

I finally got the game I started in November into some semblance of how I wanted it to look.  The running dog animation anyway.  Still playing with different backgrounds but this one is sure “fun”.

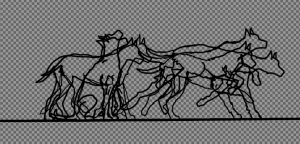
It took a long time to get all the dog actions done drawing each one by hand and getting a lot of unsatisfactory results.  The animation is all “flip-book” style with each frame a different drawing.  There were between 70 to 80 pictures for the entire set.

The art was done in gimp with the help from some nice veterinarian manuals on the dog gait.

I mocked up a few transitions from an opening scene to a nice zoom down to playing position.

Then moved between a sedate walk to a running gallop and a little jump.  She looks like she’s really flying now!


During this time I also had a big problem with corrupted a scene after playing in the Animator window.  Big tip and future post – do not restart Unity if it crashes without taking a copy of your temp directory first. It took me about two weeks to rebuild everything but more on that later.